Here at Resilience Central, we decided to take a break from researching improvised face-masks and try out a craft recipe. Squares of cloth impregnated with beeswax are a useful alternative to clingfilm, so we set about making some.
Before you try this at home, make sure you have examined the item as sold in shops or craft markets. This will give you an idea of what it should look like.
You will need
- some light cotton cloth, about thin tea-towel grade
- beeswax
- An electric iron which will be dedicated to wax-based crafts from now on
- An old towel
- greaseproof paper
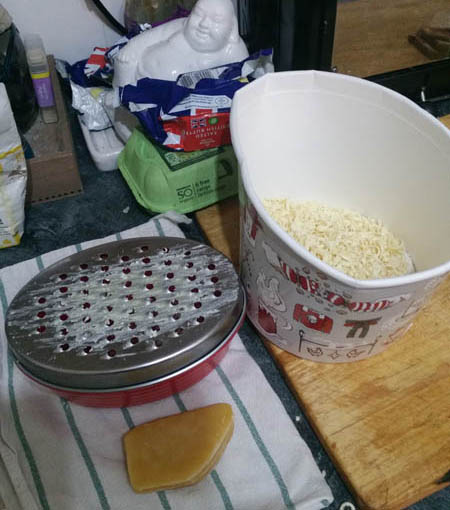
You have to grate the beeswax, but a good rinse with boiling water should clean up the grater.
We had a block of about 500 grams and used two-thirds of it. We made two large cloths and four small ones from this, as follows….
We were working on the kitchen counter, but with a bit more thought we’d have found a large sheet of wood, or a table instead. Lay down the old towel, which will also belong in the wax box now – don’t try to wash it in a machine!
On top of this goes a large sheet of greaseproof paper. We were lucky enough to have catering size, but you can use smaller gauge and overlap the sheets. The layer of paper has to be larger than the cloth. The cloth to be waxed goes on next, and is sprinkled with the grated wax.
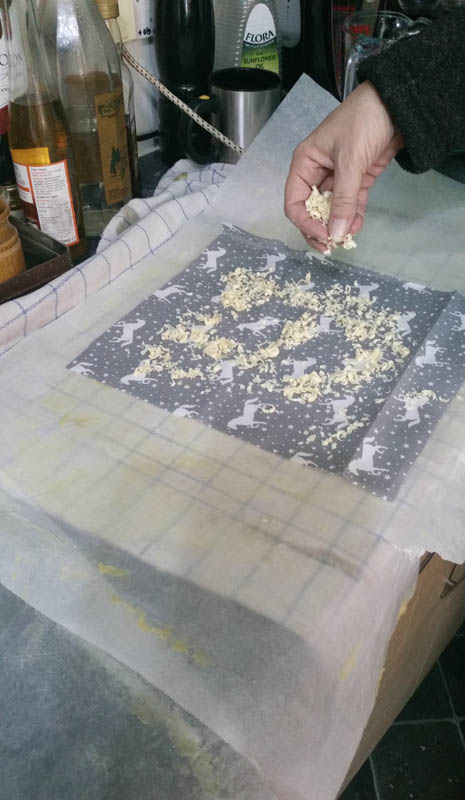
After some trial and error, we found this amount worked for us. Cover the cloth with another piece of greaseproof paper. Set your iron quite high, on the linen setting, and on no account use steam. Iron over the top paper. You’ll soon see the wax melting underneath; push it all over the cloth with the iron.
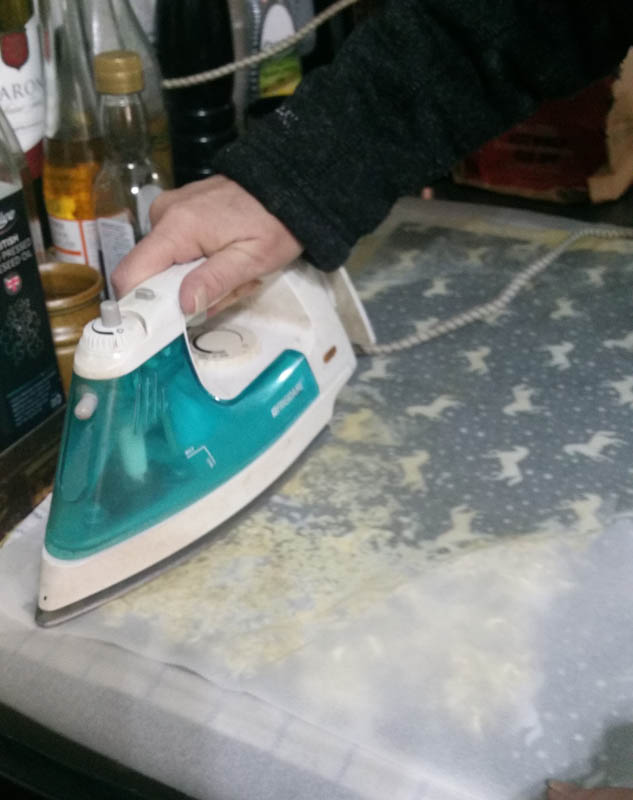
Observe how the greaseproof paper goes transparent. You can see where the wax is going. While ensuring a good seal, try not to lose too much over the edge of the cloth, as it’s very difficult to retrieve from the paper afterwards.
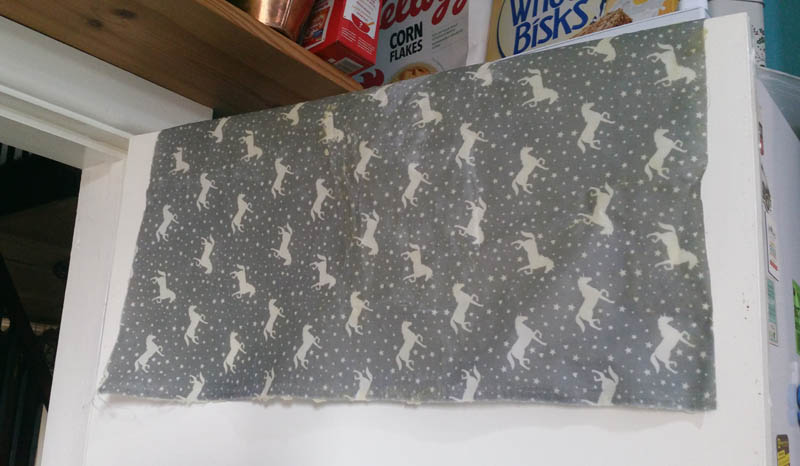
When you’re sure all the cloth is covered with as even a layer of wax as you can achieve, give the top paper a quick warm up with the iron and peel it off. Pick up the waxed cloth and hold it up by the corners until it cools down a bit, then drape it over a rack or the top of a door.
The faster you separate the cloth and papers, the easier it will be. If you let the wax cool down, the paper may tear, which is a pity as you can reuse it for this purpose until it does.
So that’s how we made waxed cloth.
You have to wipe it clean after use, not wash it. If the cloths begin to get a bit crumpled and cracked, get out the wax box again and re-iron them as explained above. You probably won’t need to add any more wax, just melt what’s already there and spread it around some more.
Remember to get your fortnight’s worth of tinned and dried food in! That’ll see you through a quarantine. There’s a list and lots of other useful advice in ‘Recipes for Resilience – common sense cooking for the 21st century’
